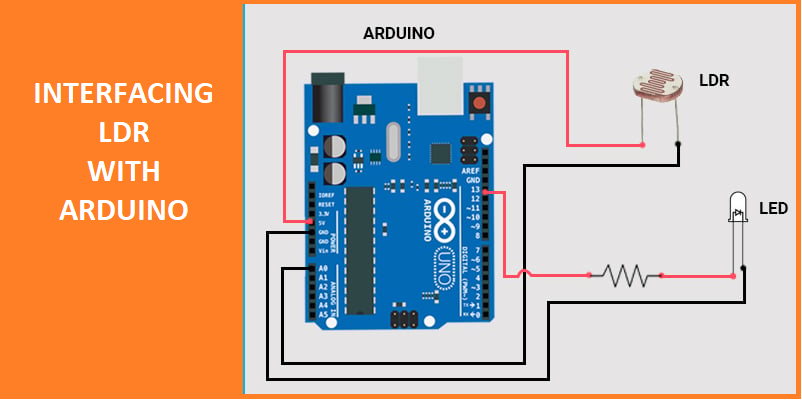
Interfacing LDR with Arduino
Interfacing LDR with Arduino
Code
const int ledPin = 13;
Serial.println(ldr);
}
How To Turn On The LED Bulb Using LDR Sensor?
As you are now fully aware of the functionality of LDR SENSOR, we will now implement that functionality in our application.
As we know, when there is no light, the output of the LDR SENSOR will be low and when the light is directed at the LDR, the output of the LDR will be high.
So, what you need to do is, you have to connect the LED bulb to the relay module and the input pin of the relay pin module to the Arduino. By the way, We have written a blog on how to interface relay module with Arduino.
So if you are new and don't know how to use relay module then we request you to check this blog of ours.
Now, in coding you have to write another expression and that expression will be as follows:
This was one of the applications of LDR sensor. In the next part of this blog, you will understand some more applications of LDR sensor.
Application of The LDR
- In stud lights - As discussed in the earlier sections of this the LDR sensor can be used in the stud light for detecting sunlight.
- In alarms and street lights.
Conclusion:
So, in this blog, we understood about LDR sensor and its working principle. If you have any doubts, please let me know in the comments section, I will be happy to address your doubts.



.jpg)
